


Trip overview: 2 Day/3 Night camping and hiking trip in Grand Canyon National Park. We did one big hike totaling ~17 miles and +/- 4,500 feet with a starting (and peak) elevation of 7,200 feet and a minimum elevation of 2,400 feet. Highlights included amazing views of the Grand Canyon and Colorado River. We did this trip over Memorial Day weekend in 2015.

Grand Canyon South Rim Map (pdf)
Shop Sale & Clearance Items at REI.com (up to 50% off)!
Preparations:
Permits and reservations: For this hike it is best to reserve a campsite at the Mather Campground. It is open year round and has water, restrooms, and showers. It costs $18 per night to camp, and it is strongly recommended to reserve sites ahead of time in the summer months. You reserve sites here and can do so 6 months in advance of your stay.
If you prefer backpacking and backcountry camping rather than drive-in camping, you can apply for a backcountry permit using this form. You will want to mail or fax your application by 5pm MST on the 1st of the month that is four months prior to your proposed start data. Permits cost $10 each plus $8 per person per night camped above/below the rim. Getting a permit will allow you to camp at the bottom of the canyon and split this hike up over 2 days. That said, many people apply for these permits so there is no guarantee you can get one during the prime seasons.
We initially wanted to camp in the canyon at either Bright Angel Campground or Cottonwood Campground and hike from the South Rim to the North Rim, but we did not secure a permit. So, we ended up reserving a site at Mather Campground and doing the day hike.
Day 1: On the first day/night, we arrived at the Grand Canyon via the South Entrance on Route 64. We checked into our campsite, which was pretty spacious and then relaxed and rested up for our big hike the next day. Mather Campground is nice and it has all the amenities you need (potable water, picnic tables, fire rings, showers for a fee, a nearby general store, etc.).
Nights were a little chilly in late May because the campground sits at 7,000 feet elevation, but it never got too cold. Our main issue was that the weather over the weekend was fairly rainy and cloudy. There are trees in the campground, so you can likely find a spot for a hammock. However, you will want to take hammocks and clotheslines down at night because there are cow elk wandering around the campground who could get stuck in your lines.


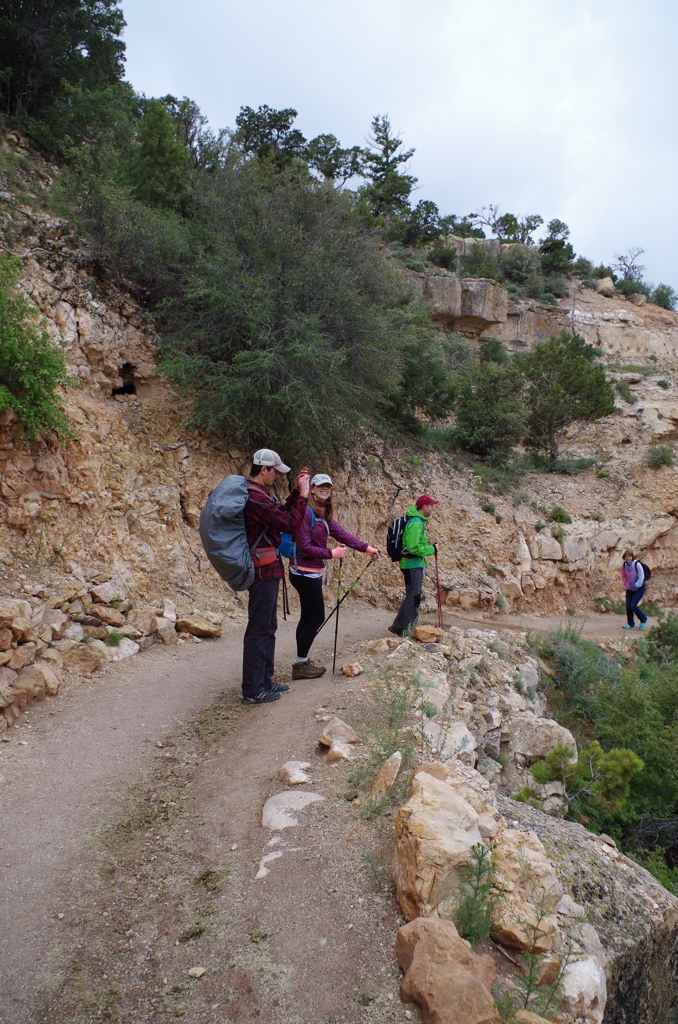
Day 2: The next morning we got up, ate breakfast, and headed out for our big hike. We drove ~1.5 miles to the parking lot next to the Grand Canyon Visitor Center and then walked to the shuttle stop so we could get a ride to the South Kaibab Trailhead.
We grabbed a ride on the Orange Shuttle which regularly goes from the Visitor Center to the trailhead. The shuttle leaves every 15 minutes after 6 am. We got a bit of a late start to the day and made it to the South Kaibab Trailhead at about 9:30 am. We set out on the hike at 9:45 am. Realistically we should have started the hike 2-3 hours earlier to avoid hiking in the canyon during the hottest part of the day. We got lucky and did not have any issues with heat because it was cloudy and rainy (this made it harder to take pictures though…).

Rough Overview of the Hike:
Simply put, this was a long and difficult hike. I highly suggest reading some of the literature on the Grand Canyon National Park Website to learn more about the trails and weather if you are going to do a long hike. We were totally fine on the hike, but we are experienced hikers and we planned ahead and brought sufficient water. If you are not sure of your hiking abilities, do not hike all the way to the Colorado River. You should just pick one trail and hike at most ~3 miles down and back.
If you do plan to do this hike (it’s totally worth it if you are prepared and in shape!) you will want to carry >2 liters of water and bring snacks to recharge when you reach the Colorado River. Be aware that this hike took ~9 hours to complete, so you should leave early to avoid being at the bottom of canyon during the hottest part of the day. As far as what gear to bring – this will depend on what time in the year you hike. It will often be chilly in the early morning and very hot during the day, so bringing multiple layers is useful. Here is a list of the gear we brought on our hike.
- Base layer hiking shirt (Columbia Silver Ridge Lite Long Sleeve Shirt)
- Warm long sleeve layer (Pendleton long sleeve board shirt)
- Rain jacket (North Face Venture 2 Rain Jacket)
- Synthetic hiking pants (prAna Zion Pants)
- Wool hiking socks (People Socks merino wool crew socks)
- Thin base layer socks for blister prevention (WrightSock CoolMesh double layer socks)
- Gore-tex hiking shoes (adidas Outdoor Terrex Fast R Gore-Tex Shoe)
- trekking poles (Cascade Mountain Tech Carbon Fiber Trekking Poles)
- 3 liter hydration bladder (Camelbak Antidote Reservoir)
With that said, here is the rough break down of the route.
-

Schematic of the two trails and the common rest points (credit: NPS)
The South Kaibab Trailhead is ~6.5 miles away from the suspension bridge across the Colorado River. Along the trail, the popular rest points are Ooh-Aah Point (0.9 mile mark), Cedar Ridge (1.5 mile mark, has bathrooms), Skeleton Point (3 mile mark), and Tip Off (4.4 mile mark, has bathrooms). It is another ~1 mile to the river and then ~0.6 miles to the Bright Angel Campground where you will find the first potable water tap. The most important thing to remember is that THERE IS NO WATER along the South Kaibab Trail! You must have enough water to make it 7 miles in the heat or you will have issues.
Why would anyone want to hike the South Kaibab Trail if there is no water? Because it provides the best views and provides a great ridgeline decent into the canyon. You are also likely to find fewer people on the Kaibab Trail (compared to the Bright Angel Trail), which is a great bonus. The Bright Angel Trail is the most popular because it has several water stops along the way and is very well maintained.
If the South Kaibab Trail is so great, why did you come back up the Bright Angel Trail? Well, we wanted to see both trails to compare! Both trails provide great scenery and views. Plus, the hike up the Bright Angel Trail is a bit more gradual and you do not have to carry as much water.
Hiking back up the Bright Angel Trail from Bright Angel Campground requires you to hike 4,500 feet up in 10 miles. It is more difficult than the first half of the hike because you are going uphill, but your pack can be a bit lighter since there are three rest stops with potable water along the trail.
Starting from the Bright Angel Campground, you pass the following rest points on the way up to the Bright Angel Trailhead: River Resthouse (1.5 mile mark, NO WATER, has bathrooms), Indian Garden (4.7 mile mark, potable water, has bathrooms), Three-Mile Resthouse (6.4 mile mark, potable water, has bathrooms), and the Mile-and-a-Half Resthouse (7.9 mile mark, potable water, has bathrooms). From the Mile-and-a-Half Resthouse, it is another 1.6 miles up to the trailhead. The main thing to pay attention to here is that you must make it the first 4.7 miles from Bright Angel Campground to Indian Garden before you can refill your water. This will likely be the hottest portion of the hike, so be sure to hydrate at the campground and to carry sufficient water to make it to Indian Garden. From that point on, you can refill your water roughly every 1.5 miles.
It is probably a good idea to bring either iodine tablets or a water filter
if you are doing a long hike like this. If one of the water stations is down, you want a backup option for water. Snacks that provide quick energy like Shot Bloks
are also important when you sweat a lot. Lastly, I strongly recommend double-layer socks
for a liner to prevent blisters with all the downhill hiking.
Hike Details: 16.6 miles; +4,300 feet, -4,800 feet; South Kaibab Trailhead to the Colorado River and then back up to the South Rim via the Bright Angel Trailhead.


After getting off the shuttle we filled up our water bottles and set off on the hike. There are water stations at both the South Kaibab and Bright Angel Trailheads. We started the hike at 9:45 am.


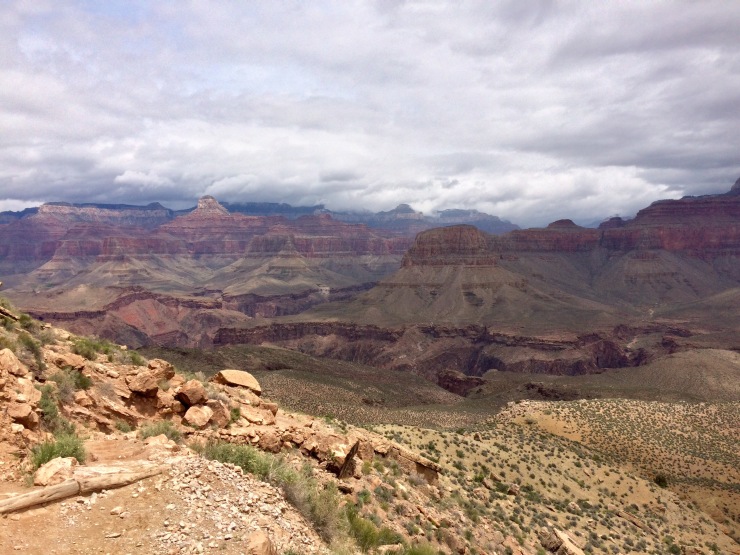
From the trailhead, we saw our first views of the Grand Canyon. The views were great, but were nothing compared to what we saw further down the trail. The trail started with a quick descent down some switchbacks and then had a pretty steady descent all the way down to the river.


When we reached the tunnel and first suspension bridge, we took a short break and celebrated. We cracked open some beers and drank them in the tunnel while it briefly poured rain outside. After the rain stopped, we crossed the bridge, turned left, and continue on the trail towards Bright Angel Campground.
We followed the trail until we reached a potable water tap near Bright Angel Campground. We chugged some water, filled up our camelbacks, and then ate some snacks. This helped get us recharged for the hike up the Bright Angel Trail. At this point we realized it was almost 2 pm and then decided we needed to pick up the pace to get back before dark. We followed the trail to the silver suspension bridge, crossed the rive, and then took the River Trail over to the Bright Angel Trail.


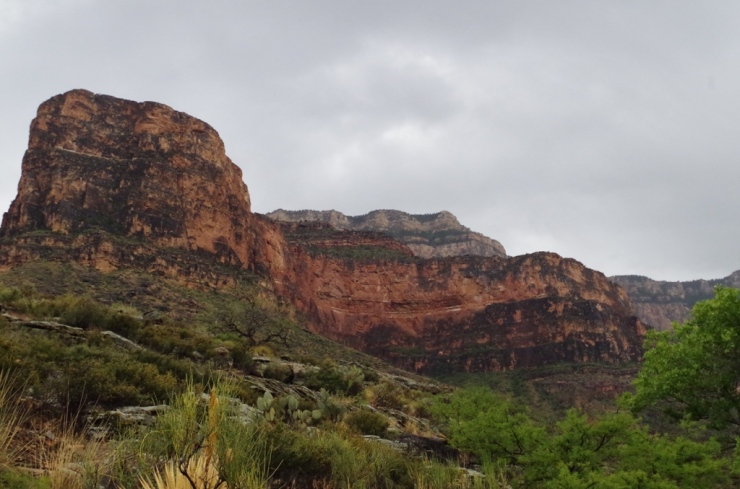


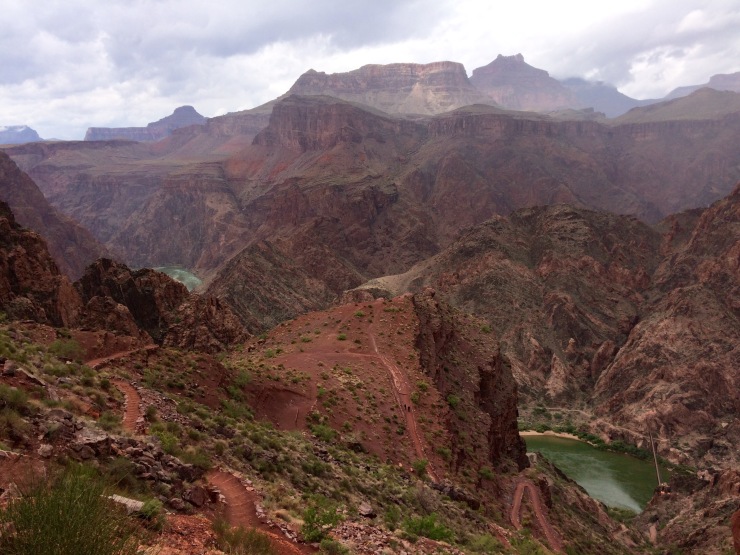
Looking up at the South Rim canyon wall from near the bottom of the Bright Angel Trail. The switchbacks in the bottom middle of the picture are known as “The Devil’s Corkscrew”.


When we got up to the Bright Angel Trailhead, we took a few pictures and then got in line to take the Blue shuttle back to the visitor center. We then got our car, drove to the campsite, and made a big dinner to celebrate finishing the hike. The Blue shuttle runs every 15 minutes between 6:15am and 7pm and runs every 30 minutes between 7-11pm.

Day 3: On the third day we didn’t have much desire to do another hike. It was raining pretty steadily and we were fairly sore. The main thing we did was go pay to take a shower and then stop at the General Store to buy a bunch of firewood and beer. For the rest of the day, we just played cards under a canopy and relaxed.

Final Notes: We had some friends who hiked all the way from the South Rim to the North Rim on Day 2 via the Bright Angel and North Kaibab Trails. They camped at the North Rim that night and then took a shuttle back to the South Rim the following day. The consensus seemed to be that the hike was great and it was a big accomplishment to make it across the whole canyon. The negatives were that it was costly because they had to pay $20 each to have a shuttle drive their bags/tents to the North Rim, and they had to pay $90 each for a ride back to the South Rim from the North Rim. Plus, the ride back took 4.5 hours so their third day was mostly spent in the shuttle. If you are in it for the glory, go ahead and go for the rim-to-rim (you will not be disappointed). If you want a less intense option that involves less spending and less bus time, the day hike described here is a good option.
Here are some related trip reports!
Yosemite Hiking – Clouds Rest and the Lembert Dome
Mount Diablo State Park – Hiking and Camping
Banff Hiking – Plain of Six Glaciers Trail, Lake Louise, and Grassi Lakes

Great article with lots of information. Thanks
LikeLiked by 1 person
Very nice trip report! It makes me wish I was there with you guys!
LikeLike
I really enjoyyed this story as I am planning a trip to do Havasupai Falls next year and this story was informative , as ia all of your wonder ful hiking adventures. I love to hike and am jealous of all the beautiful places you go and hike, keep the stories coming!!!
LikeLike
Just an excellent piece of writing and photography. Lots of important good information included. Thank you.
LikeLike
Very good summary of the hike. I liked how you divide the hike into Have fun/ Be careful / Seek advice parts. Good point mentioning the lost time in the shuttle when doing R2R. Many first time visitors to the Canyon who go for R2R may not be aware of this detail.
LikeLike